Creating a Stacking Plan
The stacking plan widget allows you to view the distribution of each floor’s space across the hold period.
To access it, select the “Tenancy” section from the left navigation menu inside a property and then scroll all the way to the bottom:
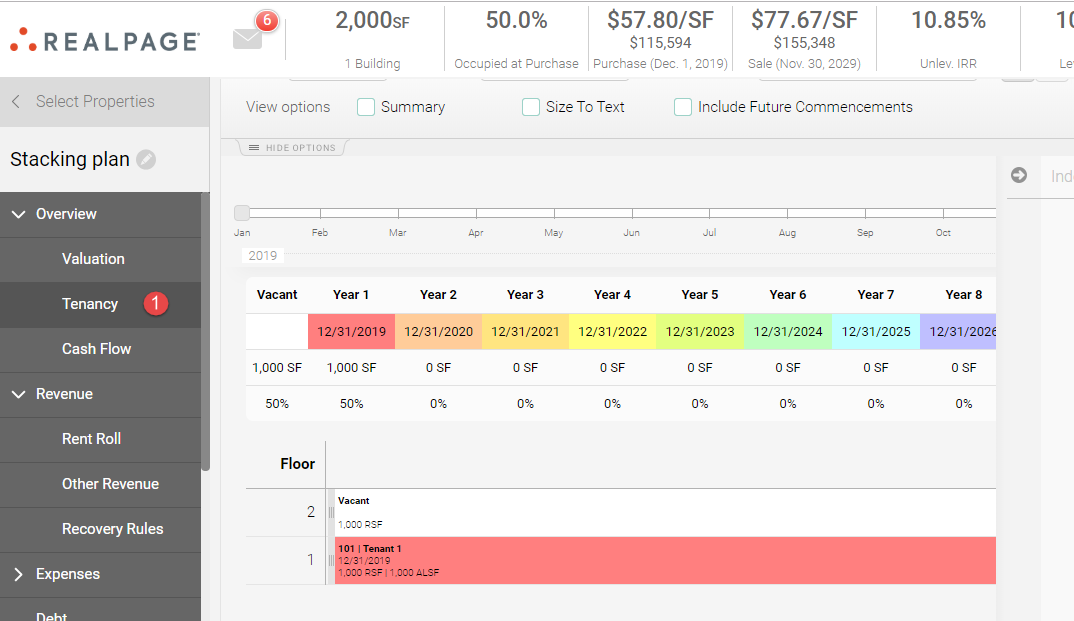
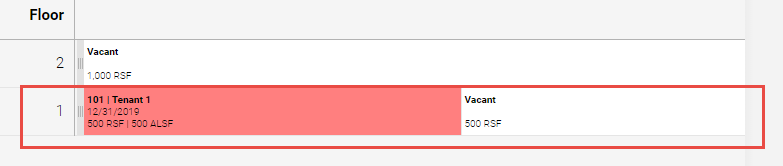
Each floor will display the distribution of tenants according to the size of their suite. In other words, if a tenant occupies half of the floor, then the size of the tenant’s bar should fit half of the floor’s row.
This widget also offers several configuration options:
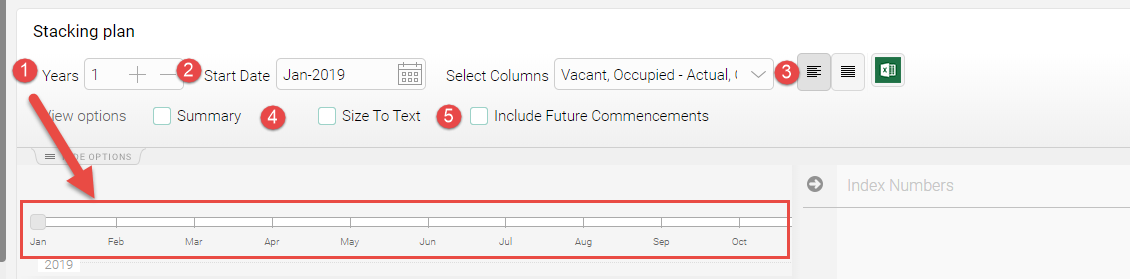
1. Number of years: This will set the number of years displayed in the scroll bar at the bottom.
2. Start date: This will set the start date to display the space distribution. Eg: If you set the start date to Jan 2019, then the stacking plan will the display the space distribution for each floor as of Jan 2019.
3. Select Columns: This option allows you to select the data columns to be displayed when the “Summary” option is active.
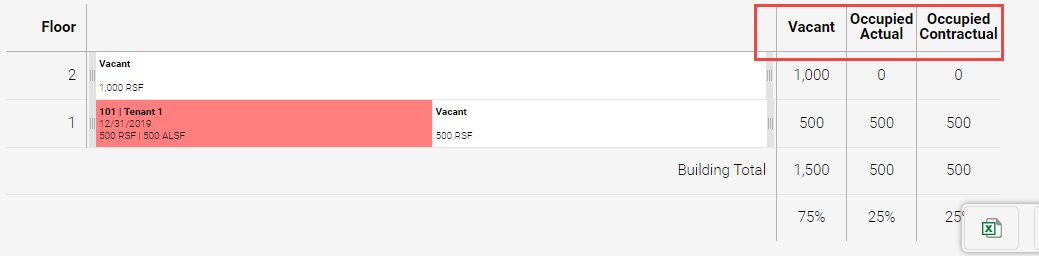
4. Summary: When active, the data columns from point 3 will be displayed.
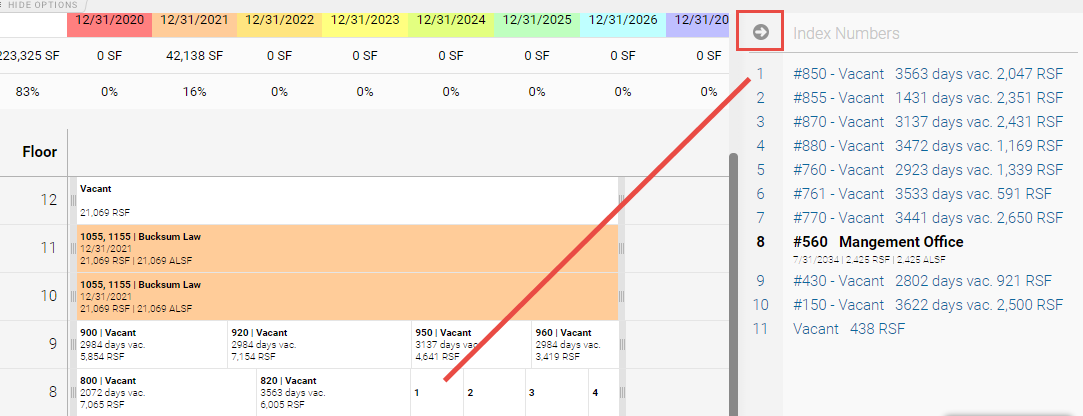
5. Size to text: When active, the suite’s information box will display text even if the space is limited. When left unticked, an index number will be displayed instead, and the information can be accessed by clicking on the expandable arrow located on the right:
Ticked:

Unticked:
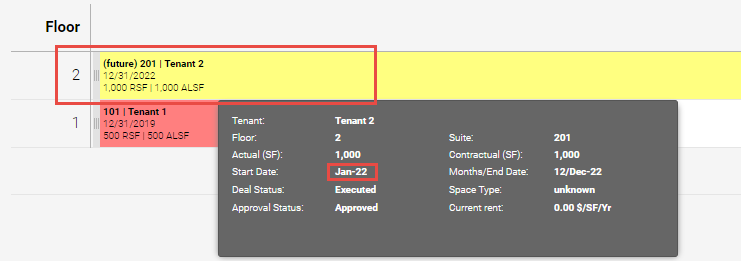
6. Include Future Commencements: This option will include leases that are executed after the report’s start date, even if the space is currently vacant. e.g: We set the report’s start date to Jan 2019 and we have Tenant 2 occupying floor 2 with a start date of Jan 2021. If we tick the option, Floor 2 will display tenant 2, but if left unticked, the suite will display a vacant space.