Rent Roll: Manual Input
Leases can be modeled by clicking 'Revenue' then 'Rent Roll' on the left navigation menu from within a selected property.
This article will review both Quick and Detailed manual input options for entering leasing information into the system.
1. Quick Input: is adequate for basic leases or properties
2. Detailed Input: is adequate for advanced leases or properties
There are three ways to access the lease input menu, you may begin entering a lease by inserting a name in the quick input textbox, clicking the “New Lease” button, or selecting Quick Input from the “New Lease” dropdown:
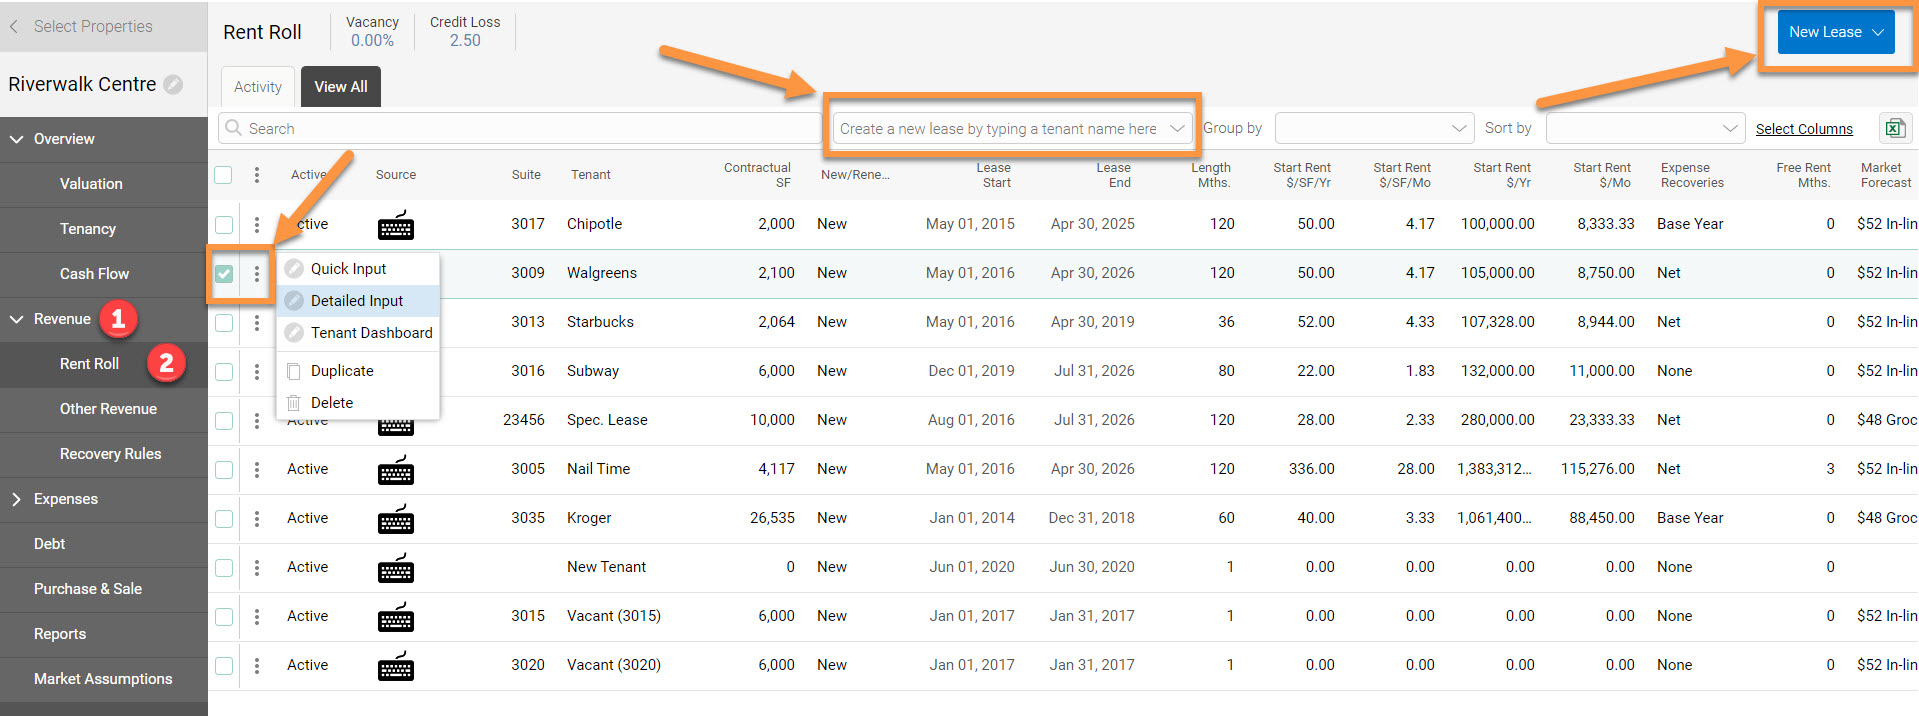
Depending on your user settings this will launch either the quick input or detailed input, which you can quickly toggle between:
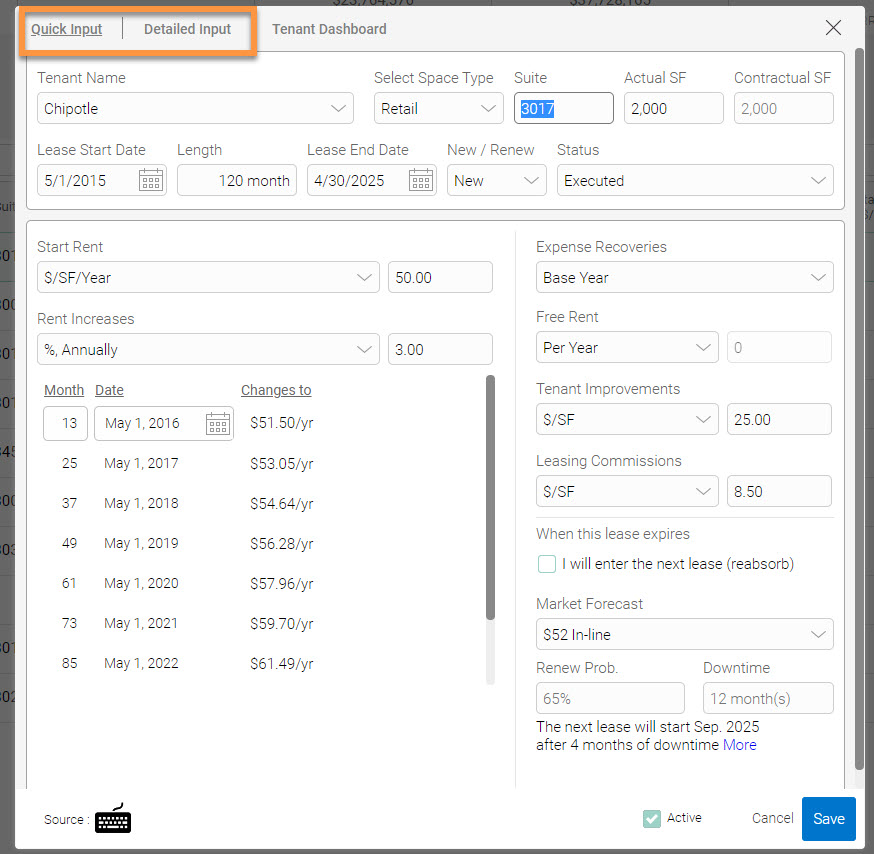
For a basic lease, you can simply input the information in the Quick Input text box and click 'Save.'
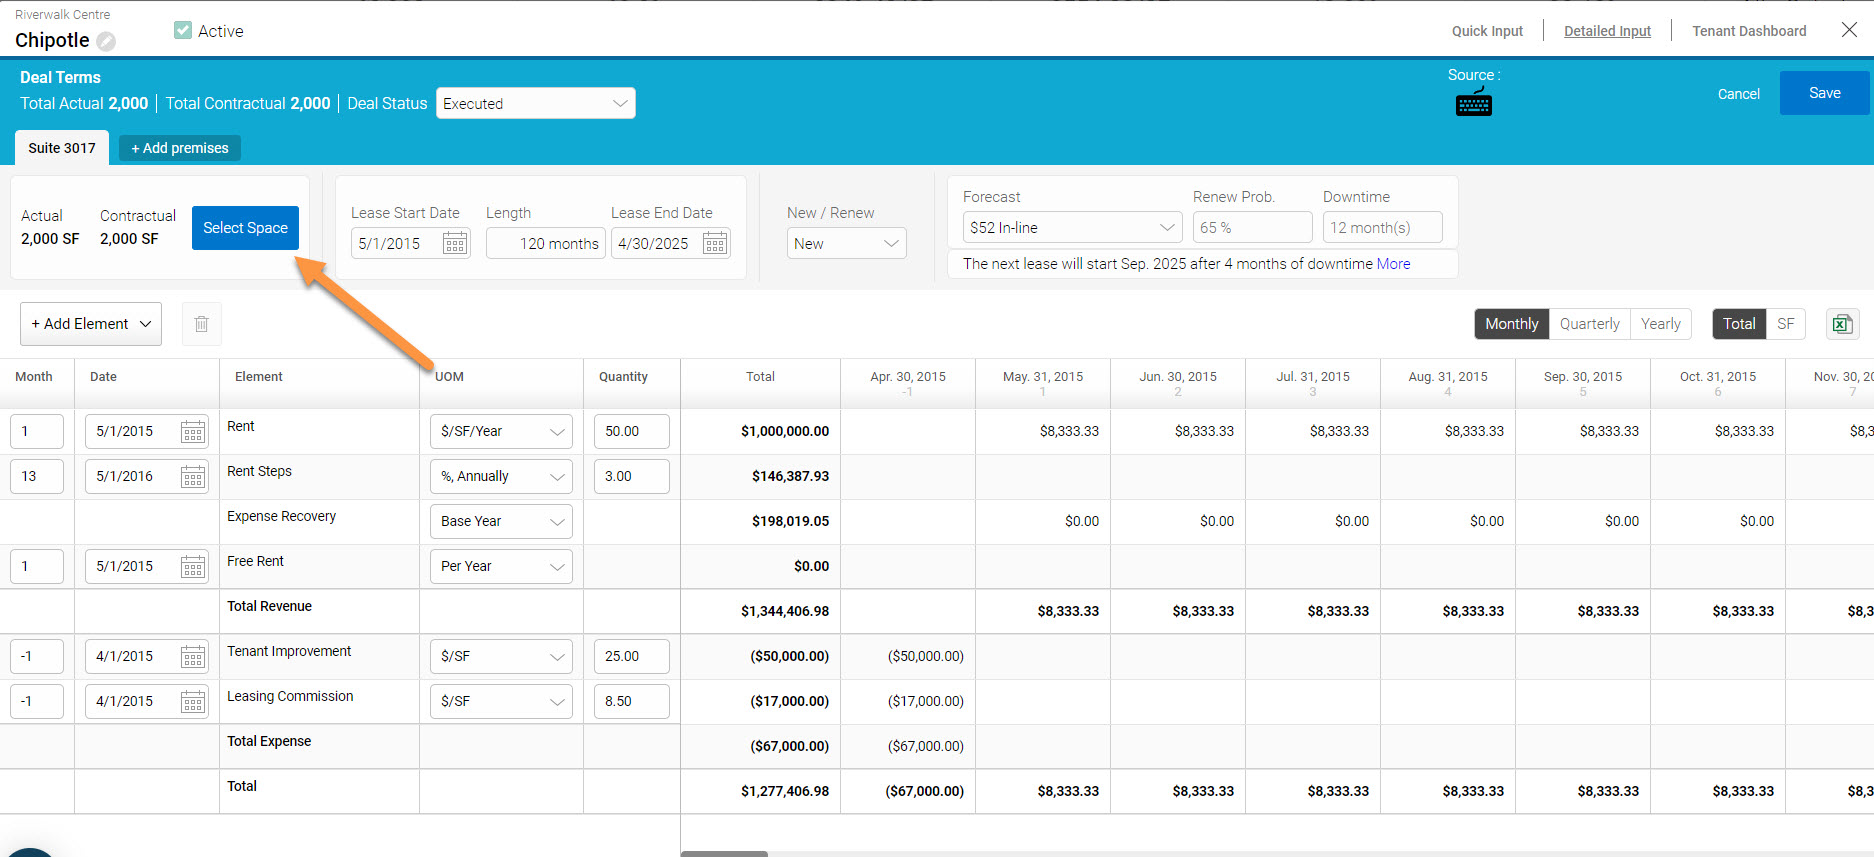
For a more complex lease, simply toggle over to 'Detailed Input.' This will guide you to identify space in the building to be occupied by a tenant. Detailed Input is also where you can create the unit space/size by clicking “Select Space”.
As an example for assigning space, the tenant below has claimed 2,000 SF in Suite 3017, which has a total NRA of 6,684 SF:
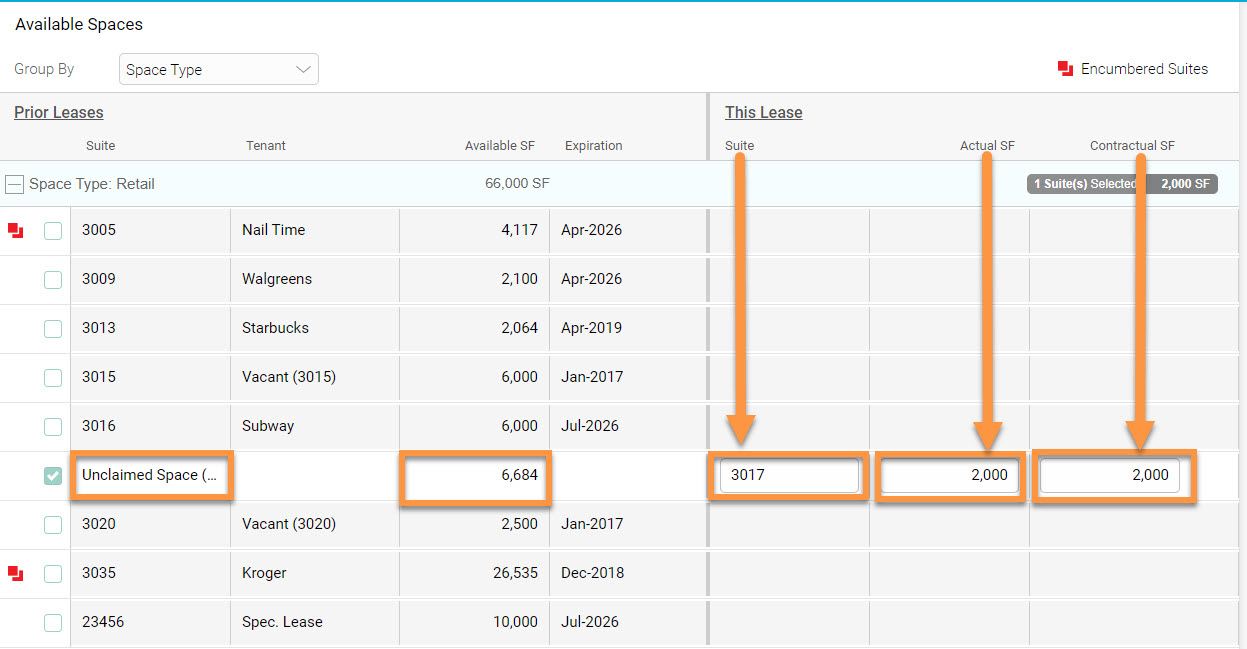
If the contractual area is different than the actual (BOMA/REBNY) area, you can enter it here. Additionally, suites can be combined by entering in the same suite number.
After measurements of the lease are entered the next step is to input financial data:

Additional Information:
1. Add Elements is used to add additional line items such as rent changes, rent steps/bumps, multiple recovery structures, etc., which are used to accurately build the lease cash flow
2. Forecast (MLA): is used to assign a forecast and optionally override the Renewal Probability or Downtime
3. Expense Recovery is used to select a predefined (Net, Base Year, or Direct Entry) recovery or user created scenario. To override the tenant’s pro-rata share overwrite the value in the “Allocated” textbox.